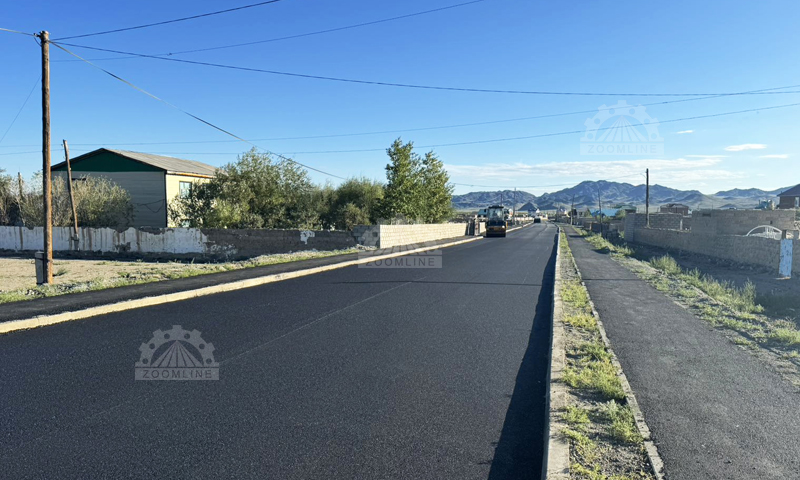
In modern transportation infrastructure, asphalt pavement has become one of the preferred materials for road paving due to its unique advantages. It offers excellent driving comfort, effectively reducing bumps and making the driving experience smoother and more stable; its good anti-skid properties greatly enhance vehicle safety in various weather conditions, especially in rainy weather, significantly reducing the risk of skidding and ensuring traffic safety; moreover, construction is relatively convenient, allowing for rapid paving and commissioning with minimal impact on traffic, which is particularly important in urban road construction and maintenance.
However, asphalt pavements also present some potential risks. Their durability is relatively limited; under long-term traffic loads and harsh natural environments, they are prone to defects such as ruts, cracks, and potholes. This not only affects the road’s aesthetics but also threatens driving safety and shortens the road’s lifespan. Furthermore, they are highly temperature-sensitive; in hot weather, asphalt pavements may soften or even flow, while in low temperatures they are prone to becoming brittle and cracking. This poses a significant challenge to the pavement’s stability and structural strength.
Therefore, scientific and reasonable planning and meticulous execution play a crucial role in the asphalt pavement paving process, and are key to ensuring pavement quality and service life. Poor planning can lead to material waste, increased costs, and even affect the entire project schedule; while inadequate execution can cause various quality problems and increase later maintenance costs. Therefore, this article will delve into the key points to consider in each stage, from project planning, foundation preparation, and paving process to compaction, curing, and sealing protection. It will also analyze common paving errors, pavement problems and their repair strategies, as well as how to select suitable contractors and conduct long-term maintenance, aiming to provide comprehensive and systematic guidance for asphalt pavement paving.
Accurate measurement is the cornerstone of asphalt pavement paving projects, and its importance cannot be overstated. In practice, professional surveying tools, such as total stations and levels, are required to meticulously measure key parameters such as the length, width, and slope of the paving area. Taking a small parking lot asphalt paving project as an example, if the length measurement error reaches 1 meter and the width error is 0.5 meters, based on an average thickness of 5 centimeters, it will lead to a deviation of approximately 0.25 cubic meters in asphalt usage. This will not only cause material waste or shortage but also directly affect project costs, potentially increasing costs by hundreds of yuan or even more.
Material estimation requires precise calculation of the necessary quantities of asphalt, aggregates, fillers, and other materials based on measurement data and design requirements. Typically, the mix proportions of asphalt concrete are rigorously designed. For example, in the common AC-13 type asphalt concrete, the ratio of asphalt, aggregates, and fillers is approximately 5:90:5. Based on this ratio, combined with the measured paving area and design thickness, the quantities of various materials can be accurately estimated. At the same time, a certain loss factor, generally around 3% to 5%, must be considered to account for unforeseen circumstances during construction.
Asphalt is a complex organic binder with unique properties. At room temperature, it exists in a semi-solid or solid state with good viscosity, enabling it to effectively bind aggregates together to form a robust road structure. However, asphalt’s properties are extremely sensitive to temperature changes. In high-temperature environments, asphalt gradually softens and its fluidity increases; when the temperature reaches a certain level, it may flow, which is particularly noticeable in hot summers. For example, when the temperature reaches above 35°C, asphalt pavements may experience slight deformation, easily leaving ruts after vehicles pass over them. In low-temperature environments, asphalt becomes brittle and its toughness decreases; when the temperature drops below a certain value, it is prone to cracking under vehicle loads or other external forces. In northern winters, where temperatures often fall below -10°C, cracking of asphalt pavements is a common problem.
In addition, asphalt possesses a certain degree of durability, but this durability is affected by factors such as ultraviolet radiation and moisture erosion. Prolonged ultraviolet radiation degrades the polymers in asphalt, leading to decreased pavement strength and durability, and surface spalling. Moisture penetration reduces the bond between asphalt and aggregates, accelerating pavement damage. Therefore, fully considering these factors and implementing appropriate protective measures during construction and subsequent maintenance is crucial for extending the service life of asphalt pavements.
Climate conditions have multifaceted effects on asphalt pavements. In high-temperature regions, such as parts of southern my country, summer temperatures often exceed 30°C, leading to severe rutting problems on asphalt pavements. High temperatures soften the asphalt, and under repeated vehicle loads, the pavement is prone to permanent deformation, forming ruts and affecting driving safety and comfort. In low-temperature regions, such as northern winters where temperatures can drop below -20°C, the asphalt becomes brittle and prone to shrinkage cracks. These cracks expand over time, eventually causing pavement damage.
Rainfall and humidity are also factors that cannot be ignored. Excessive rainfall can cause the road surface to remain waterlogged for extended periods. Moisture seeps into the pavement structural layers, reducing the bond between asphalt and aggregate, leading to problems such as spalling and potholes. High humidity also negatively impacts asphalt pavements, accelerating asphalt aging and reducing the pavement’s lifespan.
Soil conditions are equally important. If the soil’s bearing capacity is insufficient to withstand the loads of the road surface and vehicles, it will lead to road subsidence and deformation. For example, in some areas with soft soil foundations, if asphalt pavement is laid directly without effective foundation treatment, the road surface is prone to problems such as sinkholes and cracks. In addition, the soil’s pH level also affects asphalt pavement; acidic soil may corrode asphalt and reduce its performance.
A reasonable budget and timeline are crucial for the smooth progress of a project. Budget preparation must comprehensively consider material costs, labor costs, machinery costs, and other miscellaneous expenses. Regarding material costs, the prices of asphalt, aggregates, and fillers fluctuate due to market supply and demand, origin, and other factors. The budget should reference recent market prices and allow for some adjustment flexibility. Labor costs need to be determined based on local labor market rates, the number of construction workers, and the project duration. Machinery costs include the rental or purchase costs of equipment such as pavers, rollers, and transport vehicles, as well as fuel and maintenance expenses.
Taking a city road asphalt paving project with a length of 1 kilometer and a width of 10 meters as an example, assuming the unit price of asphalt concrete is 500 yuan per cubic meter, the paving thickness is 0.05 meters, the required volume of asphalt concrete is 500 cubic meters, and the material cost is approximately 250,000 yuan; 20 construction workers, a construction period of 20 days, and a daily wage of 300 yuan per person, resulting in a labor cost of 120,000 yuan; paving machine rental is 2,000 yuan per day, and road roller rental is 1,500 yuan per day, with a machinery rental cost of 70,000 yuan over 20 days; plus transportation costs, management fees, and other expenses of 50,000 yuan, the total budget is approximately 490,000 yuan.
The timetable planning must fully consider the sequence and time requirements of the construction procedures. Generally, preparatory work before construction, such as site clearing and material procurement, requires 3-5 days; during the asphalt paving stage, at a pace of 100-150 meters per day, paving 1 kilometer of road will take approximately 7-10 days; the compaction and curing stage requires 3-5 days; and the final surface treatment and acceptance work requires 2-3 days. The entire project duration is approximately 15-20 days, but this needs to be adjusted appropriately based on actual conditions, such as weather changes and construction difficulty.
Hot-mix asphalt and cold-mix asphalt differ significantly in their properties and applicable scenarios. Hot-mix asphalt requires heating the asphalt and aggregate to a high temperature for mixing, typically 160℃-180℃ for asphalt and above 160℃ for aggregate, followed by paving and compaction at this high temperature. This type of asphalt mixture exhibits high initial strength, excellent road performance, and outstanding performance in high-temperature stability, low-temperature crack resistance, water damage resistance, and fatigue life. After compaction, it has high density, with a porosity generally controlled at 3%-7%, resulting in good durability. Therefore, hot-mix asphalt is suitable for scenarios with high traffic volume and heavy vehicle loads, such as main roads and highways, where high pavement strength and durability are required.
Cold-mix asphalt uses specially treated asphalt binders, such as emulsified asphalt, diluted asphalt, or foamed asphalt, and mixes them with aggregates at room temperature or slightly above room temperature. Emulsified asphalt is formed by dispersing asphalt in an aqueous phase with an emulsifier to create a stable emulsion, which can be mixed with aggregates at room temperature or slightly heated (usually not exceeding 60°C). Diluted asphalt is made by mixing asphalt with volatile organic solvents to reduce its viscosity, and mixing is carried out at room temperature. Foamed asphalt is made by injecting a small amount of cold water into hot asphalt, causing it to expand and form foam, which is then mixed with room temperature or slightly damp aggregates in a mixing plant at room temperature. Cold-mix asphalt construction is convenient and flexible, requiring no large heating equipment, and the time before traffic can resume is relatively short (emulsified asphalt may require several hours to several days for curing, while foamed asphalt cures faster). It can be stored for a long time (in bags or stacks), making it particularly suitable for maintenance projects with numerous points and small workloads, such as pothole repair, crack sealing, local leveling, emergency repairs, and road construction in remote areas. However, cold-mix asphalt has lower initial strength and its final strength is usually lower than that of hot-mix asphalt. Its rutting resistance and durability are generally inferior to hot-mix asphalt, and its porosity is typically higher, possibly between 8% and 15% or even higher, affecting its waterproofing and durability. In practical applications, the appropriate asphalt type should be selected based on a comprehensive consideration of factors such as the specific needs of the project, construction conditions, and budget.
Thoroughly removing the old asphalt pavement and debris is a crucial first step before laying new asphalt. The old pavement may contain damaged asphalt layers, loose aggregate, cement blocks, and other debris. If this debris is not removed, it will affect the adhesion between the new pavement and the base layer, leading to problems such as hollow spots and detachment. At the same time, debris can also obstruct drainage, causing water to accumulate on the pavement after rain and accelerating further damage.
There are several methods for removing old road surfaces and debris. For large-scale demolition of old road surfaces, milling machines can be used. Milling machines can precisely control the milling depth, removing the asphalt layer of the old road surface while preserving a relatively intact base layer. For example, in urban road reconstruction projects, milling machines can efficiently remove damaged parts of the old road surface, creating favorable conditions for the laying of new road surfaces. For small construction areas or places where it is difficult to use machinery, manual demolition can be used. Workers use tools such as pneumatic picks and crowbars to remove the old road surface and debris one by one.
When removing debris, it is also important to protect the surrounding environment. Water trucks can be used to spray water and suppress dust during the operation to prevent dust from affecting the environment and residents. Old road materials and debris removed should be promptly sorted, cleaned, and transported. Recyclable materials, such as old asphalt and aggregates, can be recycled and used in other road works or construction projects; non-recyclable debris must be transported to designated landfills for proper disposal.
The subbase is the foundation of asphalt pavement, and its stability and compaction directly affect the pavement’s service life and performance. A stable subbase can evenly bear the load transmitted from the pavement, preventing problems such as settlement and deformation. A compacted subbase can increase soil density, reduce soil permeability, and decrease water erosion of the pavement structure.
When performing sub-base treatment, the original ground surface must first be leveled and cleaned, removing weeds, tree roots, humus, and other debris. Then, the soil is improved according to design requirements. For areas with poor soil quality, stabilizing agents such as lime and cement can be added to improve soil strength and stability. For example, on soft soil foundations, adding lime for lime-soil improvement can effectively enhance the soil’s bearing capacity.
Compaction is a crucial step in subbase treatment. Commonly used compaction equipment includes road rollers and tampers. During compaction, the principles of starting with lighter compaction and gradually increasing the intensity, starting slowly and gradually increasing the speed, and starting from the edges and then moving to the center should be followed. Appropriate compaction equipment and parameters should be selected for different soil types and compaction requirements. Generally, cohesive soils require more compaction passes, while sandy soils require relatively fewer. The required degree of compaction is usually determined based on the road grade and design standards. For expressways and Class I highways, the required degree of compaction is generally above 95%, while for Class II and lower-grade highways, the required degree of compaction is between 93% and 95%.
The main methods for testing compaction degree include the ring sampler method, sand cone method, and water filling method. The ring sampler method is suitable for testing the compaction degree of fine-grained soils. A soil sample is cut from the compacted soil layer, its dry density is measured, and compared with the maximum dry density to calculate the compaction degree. The sand cone method is suitable for testing the compaction degree of all types of soils. It uses the density of standard sand to determine the soil density, thereby calculating the compaction degree. The water filling method is suitable for materials with large pores or in situations where the sand cone method cannot be used. Water is poured into the test pit, and the volume of water is measured to calculate the soil density and compaction degree.
Using loose soil as a base can cause numerous problems for asphalt pavements. The weak cohesion between loose soil particles means they cannot provide sufficient load-bearing capacity. Under the influence of road surface and vehicle loads, they are prone to settlement, leading to problems such as depressions and cracks in the pavement. Loose soil also has high permeability, allowing water to easily seep in, softening the soil, further reducing its load-bearing capacity, and accelerating pavement damage.
If loose soil is encountered, it needs to be treated. For shallow loose soil, the replacement method can be used, where the loose soil is excavated and replaced with high-strength, stable materials, such as graded crushed stone or lime-soil. Graded crushed stone has good gradation and interlocking properties, providing high bearing capacity; lime-soil enhances the soil’s strength and stability through the chemical reaction between lime and soil. For deep loose soil, reinforcement methods such as dynamic compaction and lime-soil compaction piles can be used. Dynamic compaction uses the enormous impact force generated by the free fall of a heavy hammer to compact the soil; lime-soil compaction piles are driven into the foundation to form a composite foundation, improving the foundation’s bearing capacity.
Common base course materials include cement-stabilized crushed stone, lime-stabilized soil, and graded crushed stone. Cement-stabilized crushed stone is made by mixing cement, crushed stone, and water in a certain proportion, followed by stirring, spreading, and compaction. It has high strength and stability, making it suitable for road base courses with high traffic volume and heavy vehicle loads. Lime-stabilized soil utilizes the chemical reaction between lime and soil to improve soil properties, giving it a certain strength and water stability, but its early strength is relatively low. It is suitable for base or subbase courses of Class II and lower highways. Graded crushed stone is composed of crushed stone of different particle sizes, exhibiting good gradation and permeability, and is suitable for base and subbase courses of all levels of highways.
The required base course thickness depends on the road’s traffic load. For roads with low traffic volume and light vehicle loads, such as residential roads and rural roads, a base course thickness of 15-20 cm is generally sufficient. However, for main roads and highways with high traffic volume and heavy vehicle loads, the base course thickness needs to reach 20-30 cm, or even more. For example, in the construction of highways, to withstand the loads of numerous heavy trucks, the base course typically uses 25-30 cm thick cement-stabilized crushed stone to ensure the strength and stability of the road surface.
The uniformity and load-bearing capacity of the foundation have a crucial impact on the service life of the pavement. An uneven foundation leads to uneven stress on the pavement, and under repeated vehicle loads, cracks, deformation, and other defects are easily formed in weak areas, shortening the pavement’s service life. On the other hand, a foundation with insufficient load-bearing capacity cannot withstand the loads of the pavement and vehicles, causing problems such as pavement settlement and collapse.
To ensure the uniformity and load-bearing capacity of the foundation, quality control must be strengthened during construction. When laying the base layer, the uniformity of the material and the flatness of the paving must be guaranteed. A paver can be used for paving to ensure a consistent base layer thickness and avoid unevenness. At the same time, compaction quality must be strictly controlled, and compaction should be carried out according to the specified number of compaction passes and compaction parameters to ensure that the base layer meets the designed compaction requirements.
There are many methods for testing foundation quality. Besides the compaction test mentioned earlier, the bearing capacity of the foundation can also be assessed through methods such as the bearing plate test and deflection testing. The bearing plate test involves placing a bearing plate on the foundation surface, applying loads in stages, and measuring the settlement of the bearing plate to calculate the foundation’s resilient modulus and bearing capacity. Deflection testing uses a deflectometer to measure the deflection value of the road surface under standard loads; the smaller the deflection value, the stronger the foundation’s bearing capacity. During construction, regular quality inspections should be conducted to promptly identify and rectify problems, ensuring that the foundation quality meets design requirements.
Longitudinal slope refers to the degree of inclination of a road along the direction of travel, and it has a significant impact on vehicle performance and drainage. Longitudinal slope is usually calculated using a percentage method: Slope percentage = (Vertical rise ÷ Horizontal distance) × 100%. For example, if a road rises 5 meters vertically within a horizontal distance of 200 meters, its longitudinal slope percentage is (5 ÷ 200) × 100% = 2.5%. Different types of roads have different requirements for longitudinal slope. Generally, the maximum longitudinal slope of highways is limited to 3% – 5% to ensure vehicle safety and comfort at high speeds; while the maximum longitudinal slope of urban roads depends on the specific circumstances. The maximum longitudinal slope of main roads generally does not exceed 5%, while the maximum longitudinal slope of secondary roads and branch roads can be appropriately relaxed, but should not exceed 7% – 8%. If the longitudinal slope is set too small, the road drainage will be poor, which will easily cause water accumulation; while if the slope is set too large, it will be difficult for vehicles to drive, especially for heavy vehicles, which need more power when going uphill and stronger braking ability when going downhill, increasing the risk to driving safety.
Lateral slope refers to the degree of inclination of a road perpendicular to the direction of travel, primarily used for drainage and to counteract the centrifugal force generated by vehicles when cornering. It is calculated using a percentage method: Lateral Slope = (Center Point Elevation – Edge Point Elevation) ÷ (Distance from Center Point to Edge Point) × 100%, generally controlled between 1.5% and 2.5%. On straight sections, lateral slope allows rainwater to flow quickly to the drainage ditches on both sides of the road, preventing water accumulation. At curves, to balance the centrifugal force of vehicles, superelevation is required—lower on the inner curve and higher on the outer curve—to make vehicles more stable when cornering. The superelevation setting needs to be precisely calculated based on factors such as the curve radius and design speed to ensure vehicle safety and comfort. For example, on curves with small radii, the superelevation value may need to reach 3% to 5% to ensure that vehicles do not skid or roll over due to excessive centrifugal force at high speeds.
Drainage ditches are an important component of road drainage systems, and their design involves numerous considerations. In terms of dimensions, the width and depth of drainage ditches should be determined through hydrological calculations based on local rainfall, catchment area, and other factors. Generally, the bottom and top widths of trapezoidal drainage ditches should not be less than 500mm, and the depth should be determined based on actual conditions, but is usually not less than 300mm. For example, in areas with high rainfall, the dimensions of the drainage ditches may need to be appropriately increased to ensure smooth drainage.
The slope of the drainage ditch is also a key factor; its longitudinal slope should not be less than 0.3% to ensure sufficient water flow velocity and prevent siltation. In some special cases, such as flat terrain or long drainage distances, it may be necessary to appropriately increase the slope to improve drainage efficiency.
Slope top drainage is equally important. Constructing intercepting ditches at the slope top is a common drainage method. These ditches should be rationally laid out according to the terrain, and should be at least 5 meters away from the cut slope edge or potential landslide area. For embankment slopes, the distance between the intercepting ditch on the upper side and the toe of the embankment slope should not be less than 2 meters. In rainy areas, one or more intercepting ditches may be necessary to effectively intercept and drain surface water from the slope top. The size and slope of the intercepting ditches should also be designed according to the actual conditions to ensure timely drainage of rainwater and prevent rainwater from eroding the slope top, thus avoiding landslides and other geological disasters.
The integration of the drainage system around the site is crucial, as it directly affects the drainage effect of the entire area. When integrating the drainage system, the first step is to conduct a comprehensive survey and analysis of the drainage situation around the site, understanding information such as the layout, diameter, and drainage capacity of the existing drainage network.
Then, based on the actual site conditions, the newly constructed drainage system should be reasonably connected to the existing drainage system. During connection, ensure the sealing and stability of the joints to prevent leakage. Simultaneously, pay attention to the elevation connection of the drainage systems to avoid backslope or water accumulation. For example, when connecting the site’s drainage ditches to the urban drainage network, ensure the water level in the drainage ditches is lower than the water level in the urban drainage network to guarantee smooth drainage.
Auxiliary drainage facilities, such as storm drains and manholes, can also be considered to improve the efficiency of the drainage system. Storm drains should be located at the lowest point of the road surface to collect rainwater promptly; manholes are used for inspecting and maintaining drainage pipes to ensure the normal operation of the drainage system. By rationally integrating the drainage systems around the site, a complete and efficient drainage network can be formed, ensuring that rainwater within the site can be discharged in a timely and effective manner.
Uneven slopes can cause numerous long-term problems for asphalt pavements. Uneven slopes easily lead to water accumulation. This water accumulation keeps the pavement constantly damp, accelerating asphalt aging and peeling, and reducing the pavement’s lifespan. Water accumulation also affects vehicle safety, increasing the risk of skidding and loss of control.
Prolonged water seepage weakens the pavement’s structural layers, leading to potholes, cracks, and other road defects. These defects not only affect the road’s appearance but also exacerbate the damage, increasing maintenance costs. For example, on uneven road sections, prolonged water accumulation causes numerous potholes and cracks, resulting in a bumpy ride that not only affects driving comfort but also causes significant wear and tear on the vehicle’s suspension system and tires.
To avoid problems caused by uneven slopes, the road surface slope must be strictly controlled during construction to ensure uniformity. Advanced measuring instruments and construction techniques can be employed to improve the accuracy of slope measurements and construction quality. Simultaneously, during road use, it is essential to strengthen road surface inspections and maintenance, promptly identifying and addressing issues such as uneven slopes and water accumulation to ensure road safety and normal operation.
In slope measurement, a level is a commonly used professional tool. It uses a horizontal line of sight and a leveling rod to measure the elevation difference between two points, thereby calculating the slope. Levels offer high measurement accuracy and are suitable for applications requiring high precision. When using a level, first, the instrument needs to be placed in a suitable position, and the bubble level adjusted to ensure the instrument is level. Then, the leveling rod is erected at the measurement point, and the reading on the leveling rod is taken through a telescope. Based on this reading, the elevation difference between the two points is calculated, and thus the slope is determined. To ensure measurement accuracy, the level must be calibrated before measurement. During measurement, the leveling rod must be kept vertical and stable, and multiple measurements should be taken to obtain the average value.
A total station is also a commonly used slope measurement tool, integrating multiple functions such as angle measurement, distance measurement, and calculation. By measuring the angle and distance to a target point, a total station can automatically calculate the elevation difference and slope of that point. Total stations offer fast measurement speeds and can acquire data from multiple points simultaneously, making them suitable for slope measurements over large areas. When using a total station, the instrument must first be set up at the station, the measurement parameters set, and then the instrument aimed at the target point for measurement. The total station will automatically display the measurement results, including the target point’s coordinates, elevation difference, and slope. To ensure measurement accuracy, the total station parameters must be set correctly, and care should be taken to avoid obstacles affecting the line of sight during measurement.
Besides levels and total stations, there are other slope measurement tools, such as inclinometers and GPS measuring instruments. Inclinometers are simple and convenient tools; they are placed directly on the road surface for measurement. They are easy to operate and inexpensive, but their accuracy is relatively low, making them suitable for preliminary measurements where high precision is not required. GPS measuring instruments determine the location and elevation of measurement points by receiving satellite signals. They have a wide measurement range and are not limited by line-of-sight conditions, but their accuracy may be affected by weather, signal obstruction, and other factors. In practical applications, the appropriate measuring tool should be selected based on specific measurement needs and conditions to ensure the accuracy and reliability of slope measurements.
The temperature of asphalt materials has a crucial impact on paving quality; both overheating and undercooling can cause a series of problems. When the asphalt temperature is too high, its internal chemical structure changes, leading to asphalt aging, reduced viscosity, and weakened adhesion to aggregates. This is similar to overcooked glue, whose adhesiveness is greatly reduced, making it unable to firmly bind the aggregates together. At high temperatures, the lightweight components in asphalt will volatilize, further affecting the asphalt’s performance, reducing pavement durability, and shortening the pavement’s service life. For example, in areas with extremely high summer temperatures, if asphalt is heated to excessively high temperatures and exposed to high temperatures for extended periods, the pavement may experience severe peeling and loosening problems after only a few years of use.
Conversely, if the asphalt temperature is too low, its fluidity will decrease, becoming viscous and difficult to pave. This is similar to honey becoming too thick to pour in a cold winter. Asphalt at excessively low temperatures cannot be evenly distributed on the road surface during paving, easily resulting in uneven thickness in certain areas, affecting the smoothness of the road surface. Furthermore, asphalt at low temperatures is difficult to compact, failing to meet the designed compaction requirements, resulting in more voids within the road surface, reducing its strength and stability. These voids also easily accumulate water, accelerating road surface damage under repeated vehicle loads. Generally, the paving temperature of hot-mix asphalt should be controlled between 135℃ and 170℃, with the specific temperature needing adjustment based on factors such as the type of asphalt and ambient temperature. During construction, equipment such as infrared thermometers can be used to monitor the asphalt temperature in real time to ensure it remains within the appropriate range.
Uniform material output is crucial for ensuring the quality of asphalt pavements. Uneven material output will result in ripples and lines on the pavement, which not only affects its aesthetics but also seriously impacts driving safety and comfort. Imagine driving on a road full of ripples and lines; it’s like driving on a rough mountain road—extremely bumpy, significantly reducing the passenger experience, increasing the difficulty of vehicle handling, and increasing the risk of traffic accidents.
To avoid this situation, the paver and other equipment must be carefully tested before construction to ensure unobstructed material discharge and a stable material output speed. Operators also need extensive experience and skilled techniques to closely monitor material output during paving and adjust the paver’s speed and output as needed based on road conditions. For example, they must be able to accurately control material output when encountering changes in road width or slope to ensure road uniformity. Advanced technologies and equipment, such as automatic leveling devices and electronic control systems, can also be used to assist in controlling material output and improve paving accuracy and quality.
Slow and even asphalt paving offers numerous advantages. It ensures thorough compaction during the paving process, resulting in a higher degree of compaction and improved pavement strength and stability. A slow and even paving speed allows for uniform distribution of asphalt across the surface, preventing gaps or accumulation and ensuring a smooth road surface. Conversely, paving too quickly means the asphalt is covered before it has sufficient time to compact, leading to voids and reduced pavement quality. Furthermore, excessive speed can cause the paver to vibrate, resulting in an uneven road surface.
Generally, the paving speed of asphalt pavement should be determined based on factors such as the performance of the paver, the characteristics of the asphalt mixture, and the width of the pavement, typically between 2 and 6 meters per minute. In actual construction, adjustments can be made according to specific circumstances. For example, for wider roads, the paving speed can be appropriately increased, but it’s crucial to ensure the paver can spread the asphalt evenly; for complex road structures or small construction areas, the speed should be appropriately reduced to guarantee construction quality. Construction personnel must maintain a constant speed for the paver, avoiding sudden acceleration or deceleration to ensure the stability and continuity of the paving process.
There is a close relationship between road surface thickness and traffic load. The greater the traffic load, the greater the pressure on the road surface, thus requiring a thicker surface to withstand this pressure. For main roads and highways with high traffic volume and heavy vehicle loads, the road surface thickness is generally around 15-20 cm to ensure it can withstand the repeated compaction of a large number of vehicles and guarantee road surface durability. For residential roads and rural roads with lower traffic volume, the road surface thickness can be appropriately reduced, generally 8-12 cm is sufficient to meet the requirements.
When planning pavement thickness, multiple factors need to be considered comprehensively. Besides traffic load, the pavement’s design service life, local geological conditions, and climate conditions must also be taken into account. In areas with poor geological conditions, such as soft soil foundations, increased pavement thickness is necessary to improve load-bearing capacity. In areas with harsh climates, such as hot and rainy regions, thicker pavements can better resist rainwater erosion and the effects of high temperatures. Relevant design specifications and standards should also be followed to ensure the rationality and scientific nature of the pavement thickness. For example, according to the “Specifications for Design of Highway Asphalt Pavement” (JTG D50-2017), different grades of highways and road sections with different traffic volumes have specific requirements for pavement thickness, and these requirements should be strictly followed during design and construction.
Longitudinal joints refer to joints along the length of the road. Common treatment methods include hot joints and cold joints. Hot joints involve overlapping adjacent strips of asphalt mixture at a high temperature during paving, then compacting them together to fuse the asphalt mixture at the joint. When using two pavers in a team, the next paver paves immediately after the first, with a 5-10 cm overlap between the two strips. A roller is then used to compact the joint across the gap, ensuring its compaction and smoothness. This method is suitable for continuously paved sections and effectively improves the quality of the joints.
Cold joints are laid after the existing asphalt pavement has cooled. When treating cold joints, the edges of the existing pavement are first cut vertically, and loose material and contaminants are removed. Then, a tack coat is applied to the joint to enhance the adhesion between the old and new asphalt mixtures. When laying the new asphalt mixture, it should overlap the old and new mixtures by 5-10 cm. A roller is then used to compact the mixture laterally, gradually rolling from the already compacted pavement towards the new surface, overlapping the new mixture by 15-20 cm each time, until all the new pavement is covered. Then, longitudinal compaction is performed. Cold joints are suitable for situations where hot joints cannot be used, such as construction interruptions or pavement repairs.
Transverse joints are joints perpendicular to the length of the road. When treating them, first check the flatness of the ends with a 3m straightedge. While the surface is still warm, use a joint cutter to remove any insufficient thickness at the ends, ensuring a right-angle connection for the next construction phase. After applying a tack coat to the joint, lay new asphalt mixture and compact it transversely with a roller. Place wooden blocks on the outside of the compaction strip for the roller to travel on. During compaction, the roller should be positioned on the already compacted mixture layer, extending 15cm into the new paved layer. With each pass, move the roller 15-20cm into the new paved layer until it is completely on top, then switch to longitudinal compaction. To ensure the quality of the joints, construction personnel must strictly follow operating procedures to ensure that the flatness and sealing of the joints meet the requirements.
Using low-quality asphalt poses serious risks to road surfaces. Low-quality asphalt may contain more impurities, has poor adhesion and durability, and cannot effectively bind aggregates together, easily leading to premature damage during road use, such as cracking, loosening, and peeling. These problems not only affect the aesthetics of the road surface but also reduce its service life and increase maintenance costs. For example, some low-quality asphalt tends to soften and flow in hot weather, causing ruts and indentations; in low-temperature environments, it easily becomes brittle and cracks, severely affecting the normal use of the road surface.
There are several ways to assess the quality of asphalt. High-quality asphalt has a uniform black luster and is free of obvious impurities and particles, while low-quality asphalt may have uneven color and more impurities. Simple tests can also be used to judge the performance of asphalt, such as touching it with your finger to feel its viscosity and hardness. High-quality asphalt has moderate viscosity and uniform hardness, while low-quality asphalt may be insufficiently viscous or too hard. Choosing reputable suppliers and brands is also crucial for ensuring asphalt quality. Reputable suppliers typically have strict quality control systems and can provide asphalt products that meet standards. When purchasing asphalt, check the product’s quality inspection report to ensure that all indicators of the asphalt meet design requirements.
Common compaction tools include road rollers and rammers. Road rollers can be further divided into steel wheel road rollers, pneumatic tire rollers and vibratory rollers, each with its own unique characteristics and applicable scope.
Steel-drum rollers, with their smooth steel drums, compact the road surface to create a flat and solid surface. They are suitable for the final compaction stage of road surfaces, effectively eliminating wheel tracks and improving road smoothness. In the final compaction of urban roads, steel-drum rollers can compact the road surface very evenly, providing good conditions for vehicle traffic. Their tonnage generally ranges from 6 to 14 tons. Small steel-drum rollers are suitable for narrow areas or small projects, while large steel-drum rollers are suitable for compacting large areas of road surface.
A pneumatic tire roller applies pressure to the road surface using multiple inflatable tires, providing excellent kneading action. This makes the asphalt mixture more compact, enhancing the road’s wear resistance and skid resistance, and it is commonly used in the secondary compaction stage of road surfaces. In highway secondary compaction, pneumatic tire rollers can make the asphalt mixture on the road surface more tightly bound together, improving road quality. Their tonnage range is wide, generally between 12 and 30 tons, and the appropriate tonnage pneumatic tire roller can be selected based on the road thickness and compaction requirements.
Vibratory rollers utilize high-frequency vibrations generated by a vibrating device to rapidly compact asphalt mixtures, resulting in significant compaction effects. They are suitable for the initial and secondary compaction stages of road surfaces, especially for thicker pavement layers or materials that are difficult to compact. In projects such as airport runways where extremely high compaction requirements are necessary, vibratory rollers can compact deep layers of asphalt mixtures, ensuring the runway’s load-bearing capacity. The excitation force and vibration frequency of a vibratory roller can be adjusted according to actual conditions; the excitation force is generally between 30 and 80 kN, and the vibration frequency is between 30 and 50 Hz.
Compactors are compact and easy to operate, making them suitable for compaction work in narrow spaces, corners, and small-scale projects. In the compaction of roads around buildings or the construction of small parking lots, compactors can leverage their flexibility and convenience to effectively compact areas where large rollers are difficult to use. Their impact energy is generally between 1 and 10 kJ, and the appropriate compactor can be selected based on specific construction needs.
When using compaction tools, certain methods and precautions must be followed. Before compaction, ensure the road surface is flat and clean to avoid debris affecting the compaction effect. During compaction, follow the principles of starting with light compaction and gradually increasing the weight, starting slowly and gradually increasing the speed, and starting from the edges and then moving to the center. First, use a light roller for initial compaction to stabilize the road surface; then use a heavy roller for secondary compaction to increase the compaction degree; finally, use a light roller for final compaction to eliminate wheel tracks and improve flatness. Regarding compaction speed, the speed should not be too fast during initial compaction, generally controlled at 2-3 km/h to ensure sufficient compaction time; the speed can be appropriately increased during secondary compaction, generally 3-5 km/h; and the speed should be controlled at 3-4 km/h during final compaction. At the same time, pay attention to the overlap width between adjacent compaction strips, generally 15-20 cm, to ensure uniform compaction.
Layered compaction is a crucial step in ensuring the quality of asphalt pavement. Its principle lies in dividing the pavement into several layers for compaction, ensuring each layer meets the designed compaction requirements, thereby improving the overall strength and stability of the pavement. Layered compaction effectively avoids problems such as uneven compaction and insufficient compaction of lower layers caused by excessively thick compaction in a single operation. In actual construction, asphalt pavement is generally compacted in layers: a lower layer, an intermediate layer, and a top layer. The thickness of each layer depends on design requirements and construction conditions; typically, the lower layer is 4-6 cm thick, the intermediate layer is 3-5 cm thick, and the top layer is 2-4 cm thick.
The optimal density requirement for each compacted layer needs to be determined based on the specific engineering design and specifications. Generally, the compaction degree of asphalt pavement should reach over 95%, meaning the compacted pavement density should reach over 95% of the maximum theoretical density. The maximum theoretical density can be calculated through laboratory tests or formulas in relevant specifications. Methods for testing compaction degree mainly include the sand cone method and the nuclear density meter method. The sand cone method involves measuring the mass of sand in a test cavity, calculating the volume of the cavity, and then obtaining the density of the material within the cavity. This density is then compared with the maximum theoretical density to determine the compaction degree. The nuclear density meter method utilizes the penetration of radiation emitted by radioactive elements into the pavement material, and the density and compaction degree of the material are determined based on the attenuation of the radiation. During construction, the compaction degree of each layer should be tested according to the specified testing frequency to ensure that the compaction degree meets the requirements. If the compaction degree is insufficient, it needs to be supplemented in a timely manner until the design requirements are met.
Insufficient compaction can cause numerous serious problems for asphalt pavements, with pavement deformation and rutting being the most common. When compaction is insufficient, numerous voids exist within the pavement, reducing its strength and stability. Under repeated vehicle loads, the pavement is prone to deformation, resulting in unevenness such as depressions and bulges. Rutting is also a common consequence of insufficient compaction. Due to inadequate compaction, repeated rolling by vehicle tires gradually forms longitudinal grooves on the pavement, affecting not only driving comfort but also posing a threat to driving safety. On highways, rutting can cause vehicles to lose directional control, increasing the probability of traffic accidents.
Insufficient compaction accelerates pavement damage and shortens its service life. Due to the numerous voids in the pavement, moisture easily seeps in, weakening the bond between asphalt and aggregate, leading to loosening and peeling. These defects further weaken the pavement’s structural strength, causing it to deteriorate more quickly under vehicle loads and natural factors. Therefore, during asphalt pavement construction, the compaction process must be given high priority, strictly adhering to construction specifications and requirements to ensure the compaction degree meets design standards. This reduces pavement deformation and rutting, extending the pavement’s service life.
The curing of asphalt pavement is a gradual process, divided into two stages: initial curing and complete curing. The initial curing stage refers to the period after the asphalt pavement is laid and compacted, during which it undergoes natural cooling and preliminary physicochemical reactions, giving the pavement a certain strength and stability to withstand a certain vehicle load. Generally, the initial curing time is about 2-3 days, but the specific time is affected by factors such as ambient temperature, humidity, and asphalt type. In environments with higher temperatures and lower humidity, the initial curing time will be relatively shorter; while in environments with lower temperatures and higher humidity, the initial curing time will be longer.
The complete curing period refers to a longer curing time for asphalt pavement, allowing for stronger bonding between the asphalt and aggregates, and achieving optimal pavement performance. Complete curing typically takes 6-12 months, during which the pavement’s strength, durability, and other properties continuously improve. During curing, a series of protective measures should be implemented to ensure effective curing. Traffic should be restricted to prevent heavy vehicles from damaging the incompletely cured pavement. Generally, heavy vehicles should be prohibited during the initial curing stage, allowing only small vehicles to travel slowly; during the complete curing period, vehicle speed and load should also be controlled to avoid excessive pressure on the pavement. Covering with geotextile and watering can also create favorable environmental conditions for pavement curing.
Protecting newly paved roads is crucial for ensuring road quality and lifespan. Covering is a common protective measure, using materials such as geotextiles and plastic films. Geotextiles have good water and air permeability, preventing excessive moisture evaporation, maintaining road surface humidity, and promoting asphalt curing. They also block direct sunlight, reducing the aging effects of ultraviolet radiation on asphalt. In hot summer weather, covering newly paved roads with geotextiles can effectively lower the road surface temperature, preventing asphalt from softening and deforming due to high temperatures. Plastic films have excellent waterproof properties, preventing rainwater from seeping into the road surface and protecting the road structure from water erosion. In rainy or humid environments, covering the road surface with plastic film can prevent moisture damage.
Traffic restrictions are also an important means of protecting newly paved roads. During the road surface curing period, clear warning signs should be set up, such as “Road surface not dry, no passage” and “Speed limit,” to guide vehicles and pedestrians to detour. In some important sections, personnel can be assigned to manage traffic and ensure order. The types and loads of vehicles should be restricted; heavy vehicles and overloaded vehicles should be prohibited from driving on newly paved roads to avoid excessive pressure and damage. For vehicles that must pass, their speed should be controlled, generally not exceeding 20 km/h, to reduce the impact on the road surface. Through measures such as covering and traffic restrictions, newly paved roads can be effectively protected, ensuring they are not damaged during the curing period, thereby guaranteeing the quality and service life of the road surface.
Environmental factors have a significant impact on the curing of asphalt pavements. Temperature is a key factor; in high-temperature environments, asphalt’s fluidity increases, and the curing speed accelerates. When the temperature reaches above 30℃, the curing time of asphalt is significantly shortened because high temperatures promote the chemical reaction between asphalt and aggregates, allowing the asphalt to bond to the aggregate surface more quickly and form a stable structure. However, excessively high temperatures can also lead to accelerated asphalt aging, affecting pavement durability. During the hot summer months, if asphalt pavements are exposed to sunlight for extended periods, the lightweight components in the asphalt will volatilize, causing the asphalt to harden and become brittle, reducing the pavement’s flexibility and crack resistance.
Low temperatures slow down the curing speed of asphalt, and may even lead to incomplete curing. When the temperature is below 10℃, the fluidity of asphalt decreases, molecular movement slows down, making it difficult for the asphalt to bond with the aggregate, and the curing time will be greatly extended. In the low-temperature environment of winter, newly paved asphalt pavements may need a longer time to reach the designed strength. If traffic is opened too early, it can easily cause pavement damage.
Humidity also significantly affects curing. In high-humidity environments, moisture hinders the bonding between asphalt and aggregate, thus impeding the curing process. During rainy days or in high-humidity environments, moisture in the pavement is difficult to evaporate, forming a water film between the asphalt and aggregate, reducing their adhesion and leading to decreased pavement strength and stability. Furthermore, moisture can cause water damage to the asphalt, resulting in pavement defects such as peeling and potholes.
Wind force is also a significant factor; strong winds accelerate the evaporation of solvents in asphalt, thus affecting the curing process. In windy weather, the solvents in asphalt evaporate rapidly, causing the surface to harden prematurely while the interior remains uncured, resulting in a “false curing” phenomenon. Such pavements are prone to cracking and loosening during later use.
To promote curing under different environmental conditions, corresponding measures can be taken. In high-temperature environments, the temperature and humidity of the asphalt can be controlled by methods such as water spraying for cooling and covering for moisture retention, preventing the asphalt from aging too quickly. In low-temperature environments, heating equipment can be used to preheat the asphalt, increasing its temperature and promoting curing. In high-humidity environments, construction should be carried out during sunny periods with low humidity, or drying equipment should be used to dry the road surface. In windy weather, windbreaks can be set up to reduce the impact of wind on the asphalt.
The timing of sealing is crucial to the long-term performance of asphalt pavements. After paving, asphalt pavements undergo a curing process during which the bond between the asphalt and aggregate gradually strengthens, and the pavement’s strength and stability continuously improve. Generally, sealing after the asphalt pavement has fully cured is the optimal choice, typically between 3 months and 1 year after paving, depending on factors such as climate conditions, asphalt type, and construction techniques.
In warm, dry climates, asphalt pavements cure relatively quickly, reaching a suitable sealing state within 3-6 months. However, in cold, humid climates, the curing time is longer, potentially taking 6-12 months or even longer. If sealing is done too early, before the pavement is fully cured, the sealant may not adhere adequately, resulting in a poor seal. The sealant may then peel off or crack as the pavement further cures, failing to effectively protect the road surface. Conversely, if sealing is done too late, the pavement may have already suffered damage from oxidation, moisture erosion, and UV radiation, increasing the difficulty and cost of repair. In areas with strong UV radiation, unsealed pavements may exhibit surface aging and fading, reducing their durability.
To accurately determine whether the road surface has reached the optimal sealing time, several methods can be used for testing. Hardness testing equipment can be used to check if the road surface hardness meets design requirements; the color and gloss of the road surface can also be observed—a fully cured road surface has a uniform color and stable gloss. Alternatively, construction records and environmental conditions can be consulted, combined with experience, to determine the sealing timing.
There are various types of sealants, each with its own unique characteristics and applicable scenarios. Asphalt-based sealants, with asphalt as their main component, have good compatibility with asphalt pavements and can effectively bond to the road surface, forming a tight sealing layer. They have good waterproofing properties, effectively preventing rainwater and snowmelt from penetrating the pavement structure and protecting the pavement from water erosion. Asphalt-based sealants are relatively economical and widely used in general roads and parking lots.
Silicone sealants possess excellent weather resistance and chemical corrosion resistance, maintaining stable performance even under harsh environmental conditions. They exhibit strong resistance to ultraviolet radiation and ozone, are not prone to aging or degradation, and are suitable for areas exposed to prolonged sunlight or high levels of chemicals, such as roads and bridges in chemical industrial parks. Silicone sealants also possess good elasticity and flexibility, adapting to minor road surface deformations without cracking due to road expansion or contraction.
When selecting a sealant, several factors must be considered. The condition of the road surface is a key factor. For roads with high traffic volume and heavy vehicle loads, sealants with high abrasion resistance and shear strength should be chosen to ensure the sealant layer remains intact under repeated vehicle traffic. The environmental conditions of the road surface are also crucial. In cold regions, sealants with good low-temperature performance should be selected to prevent them from becoming brittle and cracking at low temperatures; in hot regions, sealants with strong high-temperature resistance should be chosen to prevent them from softening and flowing at high temperatures.
The amount of sealant needed needs to be calculated based on the road surface area and the sealant application thickness. Generally, a sealant application thickness of 1-3 mm is suitable. Taking asphalt-based sealant as an example, the amount needed per square meter of road surface is approximately 0.5-1.5 kg. The specific amount needs to be adjusted according to the sealant’s product instructions and actual construction conditions. When calculating the amount, the loss of sealant during the application process must be considered, which is generally around 5%-10%.
Achieving uniform application of the sealant during the sealing process is crucial for ensuring a good seal. Using specialized application equipment, such as sealant sprayers and scrapers, can improve application efficiency and quality. Sealant sprayers can evenly spray the sealant onto the road surface, forming a consistent sealing layer. When using a sprayer, the spraying pressure, flow rate, and spray gun movement speed must be adjusted according to the road surface conditions and the characteristics of the sealant. Excessive pressure may cause sealant splattering, while insufficient pressure will result in uneven application. Excessive flow rate or slow spray gun movement will result in an overly thick sealant layer, wasting material and potentially affecting the sealing effect, while insufficient flow rate or excessive spray gun movement will lead to insufficient coating thickness.
Controlling the application speed and pressure is also crucial. The application speed should be kept uniform and stable, avoiding fluctuations in speed to ensure even distribution of the sealant on the road surface. The pressure should be moderate, allowing the sealant to fully penetrate the pores of the road surface without damaging it. When using a scraper for application, apply even pressure and maintain a suitable angle between the scraper and the road surface, generally between 30° and 45°. This will ensure a smoother and more even application of the sealant.
To further ensure uniform application of the sealant, the road surface can be pre-treated before application by removing dust, debris, and oil stains, allowing the sealant to adhere better to the surface. During the application process, a designated person can inspect the application to promptly identify and correct any uneven areas.
Hasty sealing can lead to a series of serious problems. One common issue is poor adhesion between the sealant and the road surface. Because the road surface is not fully cured or not thoroughly cleaned, the sealant cannot form a good bond and is prone to detachment under the influence of vehicle traffic and natural factors. This not only fails to protect the road surface but can also pose a threat to driving safety, as the detached sealant may be picked up by vehicle tires, obstructing the view of other drivers.
Air bubbles and cracks in the sealant layer are also common consequences of rushed sealing. During hurried application, the sealant may not be thoroughly mixed, resulting in air bubbles. These bubbles form voids after the sealant layer cures, reducing its strength and sealing performance. Hasty sealing may also leave cracks and potholes in the road surface untreated, creating weak points in the sealant layer that are prone to cracking. This allows moisture to seep in, accelerating road damage.
To avoid problems caused by hasty sealing, thorough preparation is essential before construction to ensure the road surface reaches optimal sealing conditions, and the sealant must be fully mixed. During construction, it is crucial to strictly follow the construction specifications and operating procedures to ensure the sealant is applied evenly and to prevent air bubbles and cracks.
Unsealed pavements are highly susceptible to oxidation and moisture erosion. Oxidation alters the chemical composition of asphalt, leading to pavement aging. Over time, the pavement darkens, becomes rougher, and loses its original luster and flexibility. Oxidation also reduces the bond between asphalt and aggregate, causing aggregate to gradually detach from the pavement surface, resulting in a loose pavement and reduced strength and stability. In areas with strong sunlight, unsealed pavements oxidize even faster, potentially showing noticeable aging within just a few years.
Moisture erosion can also severely damage unsealed pavements. Rainwater and snowmelt can seep into the pavement structure through pores and cracks, keeping the pavement damp. Moisture reduces the bond between asphalt and aggregate, leading to peeling, potholes, and other pavement defects. In winter, the moisture that has seeped into the pavement freezes and expands, exerting significant pressure on the pavement structure, further widening cracks and accelerating damage. Long-term moisture erosion can also soften the pavement base layer, reducing its load-bearing capacity and causing problems such as settlement and deformation.
In conclusion, sealing plays a crucial role in extending the service life of road surfaces. Sealant forms a protective film on the road surface, preventing erosion by oxygen, moisture, and ultraviolet rays, slowing down the aging and damage of the road, thereby extending its service life and reducing maintenance costs.
Regular maintenance of the sealant is crucial for preserving the road surface’s sealing effectiveness and extending its service life. The maintenance frequency should be determined based on road usage and environmental conditions. For roads with high traffic volume and heavy vehicle loads, the sealant layer deteriorates more rapidly due to severe wear and tear; therefore, a higher maintenance frequency is necessary, generally recommended annually. On major urban roads, frequent vehicle traffic can easily lead to wear and cracks in the sealant layer. Annual sealant maintenance allows for timely repair of these problems, ensuring the road surface’s sealing and durability.
For roads in residential areas and rural roads with low traffic volume, the maintenance frequency can be appropriately reduced, generally requiring sealing maintenance every 2-3 years. In areas with harsh environmental conditions, such as those with high temperatures, heavy rainfall, and strong ultraviolet radiation, the sealing layer is more susceptible to erosion, and the maintenance frequency should be increased accordingly. In some southern cities, due to abundant rainfall and strong ultraviolet radiation, the sealing layer is prone to aging and damage, requiring sealing maintenance annually or every 1.5 years. In areas with better environmental conditions, the maintenance frequency can be appropriately reduced.
During sealant maintenance, a comprehensive inspection of the sealant layer is necessary to promptly identify and repair any damaged areas. For any cracked or peeling sealant layers, recoating or repair is required to ensure the integrity and sealing performance of the sealant. The type and amount of sealant can also be adjusted according to the actual road surface conditions to improve the sealing effect.
Basic preparation is the first step in asphalt pavement laying. Problems in this step will pose serious hidden dangers to subsequent construction and pavement use. Uneven grading is one of the common problems caused by improper basic preparation. It leads to poor pavement smoothness, causing vehicles to experience bumps and affecting driving comfort. Uneven grading also causes uneven stress on the pavement. Under repeated vehicle loads, weak points are easily formed in weak areas, leading to pavement damage such as cracks and potholes. These defects not only shorten the service life of the pavement but also increase maintenance costs and affect normal traffic flow.
To prevent inadequate foundation preparation, a detailed site survey and measurement must be conducted before construction to accurately understand the topography and soil conditions. Based on the survey results, a reasonable foundation treatment plan should be developed to ensure the uniformity and stability of the foundation. During grading operations, strict adherence to design requirements is essential, using professional surveying instruments and construction equipment to ensure accuracy. For weak foundations, effective reinforcement measures should be implemented, such as replacement, compaction, and dynamic compaction, to improve the bearing capacity of the foundation and prevent the formation of weak points. During construction, quality inspection should be strengthened to promptly identify and correct problems arising in foundation preparation, ensuring that the foundation quality meets design requirements.
Material temperature has a crucial impact on the paving and compaction of asphalt pavements. When the material temperature is too high, the asphalt becomes too thin and prone to flowing during paving, leading to uneven paving and areas that are too thin or too thick. High temperatures also cause a large amount of volatile components in the asphalt to evaporate, reducing its viscosity and durability, and affecting the service life of the pavement. Conversely, when the material temperature is too low, the asphalt’s fluidity decreases, becoming viscous and difficult to spread, easily leading to clumping and uneven pavement. Asphalt at low temperatures is also difficult to compact, failing to meet the designed compaction requirements, resulting in more voids within the pavement and reducing its strength and stability.
To control the material temperature, a reasonable heating temperature and heating time must be determined before construction based on factors such as the type of asphalt and ambient temperature. Generally, the heating temperature of hot-mix asphalt should be controlled between 150℃ and 170℃, with adjustments made according to actual conditions. During transportation, effective insulation measures should be taken, such as using refrigerated trucks and covering with blankets, to ensure the asphalt mixture maintains a suitable temperature upon arrival at the construction site. During paving and compaction, the material temperature should be monitored in real time using a thermometer. If any abnormal temperature is detected, adjustments should be made promptly, such as accelerating the construction speed or adding heating equipment.
Insufficient compaction is a common error in asphalt pavement construction. It increases air voids, reducing pavement strength. These air voids make the pavement more susceptible to erosion from moisture, oxygen, and ultraviolet radiation, accelerating aging and damage. Water infiltration is also a serious problem caused by insufficient compaction. Moisture seeps into the pavement structural layers through these air voids, weakening the bond between asphalt and aggregate, leading to loosening and peeling. In winter, the water that has seeped into the pavement can freeze and expand, exerting significant pressure on the pavement structure, further widening cracks and accelerating damage.
To improve compaction, appropriate compaction equipment and processes must be selected during construction. Based on factors such as pavement thickness, width, and material properties, a roller with sufficient compaction capacity should be chosen, and the number of compaction passes and compaction speed should be rationally arranged. During compaction, it is crucial to ensure the roller’s travel path is uniform, avoiding missed or over-compacted areas. Simultaneously, attention should be paid to the overlap width between adjacent compaction strips, generally 15-20 cm, to ensure uniform compaction. Auxiliary compaction measures can also be employed, such as using a vibratory roller for vibration compaction to enhance the compaction effect. After compaction, compaction degree testing should be conducted promptly, using methods such as sand cone testing or nuclear density meter testing, to ensure that the compaction degree meets design requirements. If the compaction degree is insufficient, supplementary compaction should be carried out until the design standard is achieved.
Insufficient pavement thickness poses numerous risks under heavy traffic. Heavy vehicles exert significant loads, increasing pressure on the road surface. If the pavement is too thin to withstand the repeated pressure of heavy vehicles, it easily develops ruts, cracks, and other defects. Ruts create longitudinal grooves on the pavement surface, affecting vehicle stability and comfort, increasing rolling resistance, and leading to increased fuel consumption. Cracks compromise the integrity of the pavement structure, allowing moisture to penetrate and accelerating damage. Prolonged heavy traffic also causes fatigue damage, shortening the pavement’s lifespan and increasing maintenance costs.
Determining the appropriate pavement thickness requires comprehensive consideration of multiple factors, with traffic load being a key one. For roads with high traffic volume and heavy vehicle loads, pavement thickness should be appropriately increased to improve load-bearing capacity. Other factors to consider include the pavement’s design service life, local geological conditions, and climate. In areas with poor geological conditions, such as soft soil foundations, increased pavement thickness is necessary to enhance load-bearing capacity; in areas with harsh climates, such as hot and rainy regions, thicker pavements can better resist rainwater erosion and the effects of high temperatures. When designing pavement thickness, relevant design specifications and standards should be followed, such as the “Specifications for Design of Asphalt Pavement for Highways” (JTG D50-2017), and calculations and determinations should be made based on specific circumstances.
Drainage planning plays a crucial role in asphalt pavement construction, directly impacting pavement lifespan and driving safety. Without proper drainage, water accumulation easily occurs after rain. This waterlogging keeps the pavement constantly damp, accelerating asphalt aging and peeling, and reducing its lifespan. Water accumulation also affects vehicle safety, increasing the risk of skidding and loss of control. Prolonged water seepage weakens the pavement’s structural layers, leading to potholes, cracks, and other defects, further exacerbating pavement damage and increasing maintenance costs.
To improve drainage planning, the topography, landforms, and surrounding environment of the road should be fully considered during the design phase to rationally design the drainage system. A sufficient number of storm drains and drainage ditches should be installed to ensure timely drainage of rainwater from the road surface. The spacing of storm drains should be reasonably determined based on factors such as road width, slope, and rainfall, generally between 20 and 30 meters. The size and slope of drainage ditches should also be designed according to actual conditions to ensure smooth drainage. Special drainage measures, such as blind drains and infiltration wells, can also be adopted to improve drainage efficiency. During construction, the construction quality of the drainage system must be ensured, and construction must be carried out strictly according to design requirements to avoid problems such as blockage and leakage in drainage pipes. During road use, the drainage system should be maintained and managed regularly, with storm drains and drainage ditches cleaned periodically to ensure its normal operation.
The use of substandard materials is a serious problem in asphalt pavement construction, posing significant risks to the road surface. Substandard materials often fail to meet design requirements, exhibiting poor adhesion and durability, and are unable to effectively bond aggregates together, easily leading to premature cracking during use. Premature cracking not only affects the aesthetics of the pavement but also reduces its service life and increases maintenance costs. Substandard materials may also contain more impurities, which reduce the bond between asphalt and aggregates, making the pavement more prone to loosening, peeling, and other defects.
There are several ways to assess material quality. First, observe the appearance. High-quality asphalt has a uniform black sheen and is free of obvious impurities and particles, while inferior asphalt may have uneven color and more impurities. Second, simple tests can be used to judge the material’s performance, such as touching the asphalt with your finger to feel its viscosity and hardness. High-quality asphalt has moderate viscosity and uniform hardness, while inferior asphalt may be insufficiently viscous or too hard. Choosing reputable suppliers and brands is also crucial for ensuring material quality. Reputable suppliers typically have strict quality control systems and can provide materials that meet standards. When purchasing materials, review the product’s quality inspection report to ensure that all indicators of the material meet design requirements.
Incorrect subgrade grading is a common problem in asphalt pavement construction, leading to uneven road surfaces that affect driving safety and comfort. When subgrade grading is incorrect, the road surface becomes uneven, causing vehicles to experience a bumpy ride, increasing wear and energy consumption. Uneven surfaces also affect vehicle stability, increasing the risk of traffic accidents. Incorrect subgrade grading also makes the road surface prone to puddles. After rain, water accumulates in low-lying areas, forming puddles. Puddles not only impair visibility but also make vehicles more prone to skidding, increasing driving risks. The long-term presence of puddles accelerates road surface damage, leading to potholes, cracks, and other defects.
To ensure proper subgrade grading, a detailed site survey and measurement are essential before construction to accurately determine the topography and soil conditions. Based on the survey results, a reasonable subgrade grading plan should be developed to ensure that the flatness and slope of the subgrade meet design requirements. During grading, professional surveying instruments and construction equipment must be used, and operations must be strictly performed according to design specifications. Uneven areas should be filled or excavated to ensure a smooth subgrade surface. After grading, timely quality inspection is crucial. Instruments such as levels and total stations should be used to measure the flatness and slope of the subgrade to ensure compliance with design standards. Any problems discovered should be rectified promptly until the subgrade grading meets the requirements.
The curing process is a crucial step in asphalt pavement construction. Rushing the curing process can severely impact pavement quality. When curing is rushed, the pavement softens and fails to achieve the designed strength and stability. Under vehicle loads, the pavement is prone to deformation and depressions, affecting driving safety and comfort. Early damage is another common problem caused by a rushed curing process. Because the pavement is not fully cured, its resistance to wear and erosion is weak, making it susceptible to wear from vehicle tires and erosion from natural factors, leading to cracks, loosening, and other defects. These defects further weaken the pavement’s structural strength, requiring repair or replacement within a short period, increasing road maintenance costs.
To ensure proper control of curing time and conditions, construction must be carried out strictly in accordance with specifications and requirements. The appropriate curing time should be determined based on factors such as the type of asphalt, ambient temperature, and humidity. Generally, asphalt pavement curing takes about 2-3 days, but the specific time can be affected by various factors and needs to be adjusted according to actual conditions. During the curing period, effective protective measures should be taken, such as restricting traffic and preventing vehicles from driving on the incompletely cured pavement. Covering with geotextile and watering to maintain moisture can also create favorable environmental conditions for pavement curing. After curing, quality testing should be conducted using instruments such as hardness testing equipment and deflectometers to test the pavement’s strength and stability, ensuring that the pavement quality meets design requirements.
Spalling is a common defect in asphalt pavements, mainly characterized by the gradual loss of aggregate particles from the pavement surface, making the surface rough, uneven, and loose. This phenomenon severely affects the smoothness and aesthetics of the pavement, reducing driving comfort. Spalling also leads to a decrease in the pavement’s anti-skid properties; in rainy or wet conditions, vehicles are more prone to slipping on spalled pavements, increasing the risk of traffic accidents.
The causes of spalling are complex, with a decrease in the bond strength between asphalt and aggregate being a major factor. Over time, asphalt is exposed to natural factors such as ultraviolet radiation, oxygen, and moisture, gradually aging and reducing its viscosity and bonding properties, making it less effective at binding aggregate together. At high temperatures, the softening point of asphalt decreases, further weakening the bond strength and making aggregate more prone to detachment. Frequent vehicle traffic is also a significant factor contributing to spalling. Friction between vehicle tires and the road surface causes wear, especially during sudden braking and sharp turns, where the friction is greater and can easily wear away surface aggregate. Insufficient road compaction and a less dense internal structure also make aggregate more susceptible to detachment, accelerating the spalling process.
A depression refers to a localized subsidence of an asphalt pavement, forming a pothole that is lower than the surrounding road surface. Depressions not only affect vehicle stability and comfort but also pose a threat to driving safety. Driving on a depression causes bumps and vibrations, increasing the difficulty of driver maneuvering and potentially leading to loss of vehicle control. Depressions also subject the vehicle’s suspension system and tires to additional impacts, accelerating wear and tear on these components and shortening their lifespan.
The main causes of asphalt pavement depressions include insufficient compaction, foundation settlement, and water accumulation. During asphalt pavement construction, if the compaction process is not strictly performed according to specifications and the compaction degree does not meet design requirements, numerous voids will exist within the pavement. These voids will gradually compress under repeated vehicle loads, leading to depressions. Foundation settlement is also a common cause of depressions. If the pavement foundation is not stable enough, it will settle under vehicle loads and natural factors, resulting in depressions. When laying asphalt pavement on soft soil foundations, if the foundation is not effectively treated, it may gradually settle over time, leading to depressions. Water accumulation is also a significant factor. During use, if the drainage system is inadequate, rainwater or other water sources will accumulate on the pavement, seeping into the pavement structural layers, softening the base material, reducing its strength, and causing depressions. In low-lying sections or where drainage facilities are damaged, water accumulation is more severe and prone to causing pavement depressions.
Potholes are localized voids in asphalt pavements, typically circular or elliptical in shape, varying in depth and size. Their presence poses a serious threat to the safety of vehicles and pedestrians. When a vehicle drives over a pothole, its wheels may suddenly sink into it, causing the vehicle to lurch, lose control, or even experience a tire blowout, endangering the lives of the driver and passengers. For pedestrians, potholes also easily cause tripping, falls, and other injuries.
The formation of potholes is a complex process, typically developing from fatigue cracking. Under repeated vehicle loads, the road surface experiences fatigue stress. When this stress exceeds the fatigue strength of the pavement material, cracks appear. These cracks gradually expand over time, forming a network of cracks. If moisture seeps into these cracks, the vehicle loads cause it to erode and scour the surrounding pavement material, further widening the cracks and eventually leading to material loss and pothole formation. In winter, water seeping into the cracks freezes and expands, putting even more pressure on the surrounding pavement material and accelerating pothole formation. Potholes also impair the road’s drainage performance, making it easier for water to accumulate within them, further exacerbating road damage.
Alligator cracks are named for their distinctive shape; the cracks interlock to form a pattern resembling alligator scales. These cracks typically appear on driveways, especially in areas with high traffic volume and frequent heavy vehicle traffic. The appearance of alligator cracks indicates severe damage to the road surface structure, resulting in a significant decrease in its stability and load-bearing capacity.
Alligator cracks are primarily caused by pavement structural fatigue and overloading. When a pavement bears heavy traffic loads for extended periods, especially the repeated compaction by heavy vehicles, fatigue stress develops in the pavement structural layers. Over time, this fatigue stress accumulates, exceeding the fatigue strength of the pavement materials, leading to cracks. Insufficient pavement design strength or quality issues during construction, such as inadequate compaction or improper material mix proportions, can also accelerate alligator crack formation. Unstable pavement foundations, such as subgrade settlement or insufficient strength of base materials, can also cause uneven deformation of the pavement under load, resulting in alligator cracks. Once alligator cracks form, the rate of pavement damage accelerates, requiring timely repair; otherwise, it will severely impact the normal use of the road.
Longitudinal cracks are cracks that extend along the direction of traffic flow on a road, varying in length and width. Longitudinal cracks compromise the integrity of the road surface and reduce its load-bearing capacity. As the cracks develop, moisture seeps in, weakening the pavement’s structural layers and accelerating damage. Longitudinal cracks also affect vehicle stability, causing bumps and vibrations during driving, increasing driver fatigue, and reducing driving comfort.
The main causes of longitudinal cracks include improper joint treatment and asphalt temperature shrinkage. The treatment of longitudinal joints is crucial during asphalt pavement construction. If the asphalt mixture at the joint is not sufficiently compacted, or if the bond at the joint is weak, cracks are prone to appear under vehicle loads and natural factors. Improper connection between the old and new pavement during widening or repair can also lead to longitudinal cracks. Asphalt temperature shrinkage is another significant cause of longitudinal cracks. Asphalt is a material sensitive to temperature changes; it shrinks as the temperature decreases, generating shrinkage stress. When this shrinkage stress exceeds the tensile strength of the asphalt, cracks will appear on the pavement. In winter, lower temperatures result in greater shrinkage stress in the asphalt, making it more susceptible to longitudinal cracks. Furthermore, uneven settlement of the pavement base course and eccentric vehicle loads can also contribute to the formation of longitudinal cracks.
Block cracks refer to blocky areas that form on asphalt pavements, divided into blocks of varying sizes by fissures. Block cracks make the pavement surface uneven, affecting driving comfort. As the cracks develop, the pavement’s anti-skid properties decrease, increasing safety hazards for vehicles. Block cracks also lead to poor drainage, causing water to accumulate easily within the blocky areas, accelerating pavement damage.
The formation mechanism of block cracks is mainly related to asphalt aging and thermal expansion and contraction. Over time, asphalt gradually ages, its properties change, becoming brittle and losing its original flexibility and adhesion. Under the influence of temperature changes, aged asphalt is more prone to cracking. Thermal expansion and contraction is also a significant factor contributing to block crack formation. During the day, the road surface is heated by solar radiation, causing the asphalt to expand; at night, the temperature drops, causing the asphalt to contract. This repeated thermal expansion and contraction creates stress within the asphalt, and when this stress exceeds the asphalt’s tensile strength, cracks form. Uneven base materials or quality problems during construction can also exacerbate the formation of block cracks.
Edge cracks are longitudinal cracks that appear at the edge of the road surface, typically within 1-2 feet of the edge. Edge cracks affect the overall structural stability of the road surface, making the edge prone to peeling and collapse. As the cracks develop, moisture seeps into the road structure layers, causing the base material to soften and lose strength, further exacerbating road damage. Edge cracks also affect vehicle safety, especially when vehicles are driving close to the edge, increasing the risk of tires getting stuck in the cracks and vehicles losing control.
The main causes of edge cracks are insufficient support at the road edge, poor drainage, and vehicle loads. Road edge support is relatively weak; if effective reinforcement is not implemented during construction, cracks easily appear under vehicle loads. Poor drainage is also a significant cause of edge cracks. If the drainage system at the road edge is inadequate, rainwater or other water sources accumulate, seeping into the road structure layer, softening the base material, reducing its strength, and leading to edge cracks. Vehicle loads also contribute to edge crack formation. During vehicle operation, tires exert significant pressure and friction on the road edge, especially during cornering and braking, making these forces more pronounced and prone to causing cracks.
A bulge refers to a localized upward protrusion on an asphalt pavement, typically appearing in a circular or elliptical shape. Bulges affect driving comfort, causing bumps and vibrations during driving and increasing driver fatigue. They also pose a threat to driving safety, potentially leading to loss of control, collisions, and other accidents when vehicles pass over bulging areas. Furthermore, bulges detract from the aesthetics of the road surface, reducing its overall appearance.
The main causes of road uplift are soil expansion and freeze-thaw cycles. In some areas, the soil contains a high amount of moisture or expansive minerals. When the soil moisture content increases or the temperature changes, the soil expands, exerting upward pressure on the road surface and causing it to uplift. In cold regions, freeze-thaw cycles are a common cause of uplift. In winter, water beneath the road surface freezes and expands, exerting an upward thrust on the road surface; in spring, the ice melts and shrinks, causing the road surface to subside. This repeated freeze-thaw cycle damages the road structure, leading to uplift. Changes in groundwater levels and uneven settlement of the foundation can also cause road uplift.
When problems occur on asphalt pavements, the choice between temporary and permanent repairs requires comprehensive consideration of factors such as the severity of the problem, traffic demand, and repair costs. Temporary repairs offer advantages such as ease of operation, lower cost, and shorter construction time, restoring the pavement’s basic functionality in a short period. They are suitable for emergency situations or areas with minor damage. For small potholes, a temporary repair method can be used, where repair material is directly filled into the pothole and compacted with vehicle tires, allowing for temporary passage. However, temporary repairs have poor durability and can only serve as an emergency measure, failing to fundamentally solve the pavement problem. Permanent repairs are usually required subsequently.
Permanent repair is a method for completely resolving road surface problems. It can significantly extend the service life of the road surface and improve its performance and safety. For problems such as large-area spalling, severe depressions, and deep potholes, permanent repair is a necessary option. Permanent repair requires removing the damaged road surface material, repaving with materials that meet quality standards, and strictly following construction specifications to ensure the quality of the repaired road surface. When repairing large-area alligator cracks, the entire asphalt layer in the cracked area needs to be removed, the base layer retreated, and then a new asphalt mixture laid and thoroughly compacted to ensure the stability and load-bearing capacity of the road surface. Although permanent repair is more expensive and takes longer to construct, in the long run, it can effectively reduce road maintenance costs and improve road efficiency.
The first step in peeling repair is to thoroughly remove loose material from the pavement, including detached aggregate, dust, and debris. This step is crucial as it provides a clean and solid foundation for subsequent repair work, ensuring a tight bond between the patch material and the pavement. Loose material can be removed using tools such as brooms and blowers. For stubborn debris that is difficult to remove, a high-pressure water gun can be used to wash the surface to ensure cleanliness.
After removing loose material, localized patching of the flaked areas is necessary. Choosing the right patching material is crucial; generally, the same type of asphalt mixture as the original pavement can be used to ensure compatibility and adhesion. For small flaked areas, cold-mix asphalt mixture can be used. Cold-mix asphalt mixture has advantages such as easy application and fast curing, and can be used at room temperature. Fill the flaked area with the cold-mix asphalt mixture and compact it with tools to make it flush with the surrounding pavement. For larger flaked areas, hot-mix asphalt mixture must be used. First, heat the hot-mix asphalt mixture to a suitable temperature, then pour it into the flaked area, spread it evenly with a paver, and then compact it with a roller to ensure the patch’s compaction and evenness meet requirements.
The primary task in dent repair is to remove the road material from the damaged area and clean the dented area thoroughly until the solid base layer is exposed. During removal, care must be taken to avoid causing unnecessary damage to the surrounding road surface. Tools such as cutting machines can be used to neatly cut the damaged area before removing it using an excavator or manually.
Re-laying full-depth patches is a crucial step in repairing depressions. Selecting suitable base materials for filling ensures the strength and stability of the base layer. For small depressions, graded crushed stone or similar materials can be used. Pour the graded crushed stone into the depression area and compact it with tools to achieve a certain density. For larger depressions, cement-stabilized crushed stone or similar materials are required. Mix the cement-stabilized crushed stone according to the design mix ratio, then pour it into the depression area, spread it evenly with a paver, and then compact it with a roller to ensure the compaction and smoothness of the base layer meet the requirements. After the base layer is laid, the asphalt surface layer is laid. According to the pavement design requirements, select a suitable asphalt mixture, heat it to the appropriate temperature, then spread it on the base layer, spread it evenly with a paver, and then compact it with a roller to ensure the compaction and smoothness of the asphalt surface layer meet the requirements.
The scattering method is a relatively simple and quick pothole repair method, suitable for small and shallow potholes. The operation is relatively simple; no extensive pretreatment is needed, and the repair material is directly filled into the pothole. Cold-mix asphalt is typically used as the repair material, which has good adhesion and plasticity, and can bond tightly with the surrounding pavement material at room temperature. During filling, it is crucial to ensure the repair material completely fills the pothole, avoiding voids or insufficient compaction. After filling, the repair material is compacted by the movement of vehicle tires, making the repaired surface roughly flush with the surrounding pavement. Generally, after 4-8 passes of vehicle tires, the repair material reaches a certain degree of compaction, and the pothole is initially repaired.
Semi-permanent patching is suitable for larger and deeper potholes, providing a more durable repair. When using this technique, the pothole must first be thoroughly cleaned. Use brooms, blowers, and other tools to remove water and debris, ensuring the pothole is dry and clean. Use tools to shape the sides of the pothole into a vertical shape, making the shape regular and facilitating the filling and adhesion of the patch material. After cleaning and shaping the pothole, fill it with hot-mix asphalt mixture. When filling, the material should slightly bulge in the center of the pothole, forming a small mound, and then gradually slope towards the edges, making the material flush with the edges of the surrounding pavement. Use a vibratory plate compactor or a single-drum vibratory roller to compact the filling material. Compaction should begin from the center of the pothole and gradually extend towards the edges, ensuring the material is evenly compacted. During compaction, carefully observe the compaction of the repair material to ensure it has an appropriate camber so that subsequent traffic loads can compact it to the same height as the surrounding pavement.
The principle of crack repair lies in effectively preventing moisture from penetrating the pavement structural layers by filling the cracks and applying a sealing layer, thus preventing further crack expansion and protecting the structural integrity of the pavement. Crack filler is a commonly used material for repairing cracks. It fills the cracks, forming a sealing barrier to prevent moisture, debris, and other contaminants from entering. When choosing a crack filler, it is important to select one based on the width, depth, and type of the crack. For narrow cracks (less than 1/2″ wide), polyurethane crack filler can be used. This type of filler has good elasticity and adhesion, can adapt to minor crack deformations, and effectively fills the crack. For wider cracks (greater than 1/2″ wide), rubberized asphalt crack filler can be used. It has higher flexibility and durability, and can better fill and seal wider cracks.
Before using grout, the cracks must be cleaned. Use tools such as a broom and hairdryer to remove dust, debris, and moisture from the cracks, ensuring they are dry and clean. Heat the grout to a suitable temperature to give it good fluidity, then use a grouting machine or manually to pour the grout into the cracks. During the filling process, ensure the grout completely fills the cracks, avoiding voids or gaps. After filling, use tools to smooth the grout surface, making it flush with the road surface.
Sealing is a crucial step in crack repair, forming a protective film on the road surface to enhance its waterproofing, UV protection, and anti-aging capabilities. Commonly used sealing materials include emulsified asphalt sealing and modified asphalt sealing. Emulsified asphalt sealing offers advantages such as ease of application and lower cost, making it suitable for general roads. Modified asphalt sealing offers superior performance, including high-temperature stability and low-temperature crack resistance, making it suitable for roads with high traffic volume and heavy vehicle loads. During the sealing process, the sealing material is first heated to a suitable temperature, then evenly spread onto the road surface using a distributor. After spreading, a pneumatic tire roller is used to compact the material, ensuring a tight bond between the sealing material and the road surface.
The key to repairing uplift lies in effectively treating the pavement subbase. Uplift is usually caused by problems with the subbase, such as soil expansion or freeze-thaw cycles, resulting in localized upward bulges in the pavement. During repair, the first step is to remove the uplifted portion of the pavement material. Using tools such as cutting machines and excavators, the uplifted area is neatly cut and removed to expose the subbase.
Conduct a comprehensive inspection of the exposed subgrade to determine the root cause of the problem. If the heave is caused by soil expansion, a replacement method can be adopted, removing the expanded soil and replacing it with a stable material such as graded crushed stone or lime-soil. During the replacement process, ensure that the compaction degree of the new filling material meets the requirements to enhance the bearing capacity of the subgrade. If the heave is caused by freeze-thaw action, appropriate insulation and drainage measures must be taken, such as installing an insulation layer in the subgrade to prevent moisture from freezing and expanding; improving the drainage system to promptly remove accumulated water from the subgrade and reduce the impact of freeze-thaw action.
After the subbase treatment is completed, a full-depth replacement is performed. The base course and asphalt surface course are repaved according to the pavement design requirements. Suitable base course materials, such as cement-stabilized crushed stone or lime-stabilized soil, are selected and mixed evenly according to the design mix ratio. This mixture is then spread on the treated subbase, leveled using a paver, and compacted with a roller to ensure the compaction and smoothness of the base course meet the requirements. After the base course is laid, the asphalt surface course is laid. According to the pavement design requirements, a suitable asphalt mixture is selected, heated to a suitable temperature, and then spread on the base course. This mixture is leveled using a paver and compacted with a roller to ensure the compaction and smoothness of the asphalt surface course meet the requirements.
Preventive maintenance plays a crucial role in the life-cycle management of asphalt pavements, serving as a key strategy for extending pavement lifespan and reducing maintenance costs. Regular inspections are the foundation of preventive maintenance. By conducting comprehensive, periodic inspections, potential problems such as micro-cracks, premature spalling, and minor depressions can be identified promptly. Generally, for main roads and highways with high traffic volume, monthly inspections are recommended; for less congested residential roads and rural roads, quarterly inspections are sufficient.
During the inspection process, a combination of manual inspection and instrumental testing can be used. Manual inspection primarily involves visual observation and simple tool measurements to check for road surface defects such as cracks, potholes, peeling, and bulges, as well as whether the road surface’s smoothness and skid resistance meet requirements. Instrumental testing utilizes advanced testing equipment, such as pavement smoothness meters, deflectometers, and ground-penetrating radar, to conduct more precise inspections of the road surface. Pavement smoothness meters can measure the smoothness of the road surface and promptly identify uneven areas; deflectometers can test the road surface’s load-bearing capacity and determine if there are any strength deficiencies; and ground-penetrating radar can detect the internal structure of the road surface and identify potential defects.
Once road surface problems are discovered during inspections, early intervention should be implemented immediately. For minor cracks, crack sealing can be used to fill the cracks, preventing moisture intrusion and further widening. For early spalling, localized repairs can be performed; after removing loose material, patch materials can be used to restore the road surface’s smoothness and skid resistance. For minor dents, filling methods can be used, applying suitable materials to fill the dented area and restore the road surface to a smooth state. Early intervention can effectively prevent the development of damage, reduce maintenance costs, and extend the road surface’s service life. Regular inspections and early intervention can also help identify potential road safety hazards in a timely manner, ensuring driving safety.
When selecting an asphalt pavement contractor, assessing their experience and qualifications is a crucial first step. Reviewing past project cases is an effective way to understand a contractor’s actual capabilities. By analyzing their completed projects, we can visually see their construction quality, ability to handle complex situations, and experience in constructing different types of roads. If a contractor has successfully completed multiple large-scale highway projects, they will be more confident in handling various challenges when dealing with projects of similar scale and requirements.
Years of experience are also an important reference indicator. Generally speaking, the longer a contractor has been in the industry, the more experience they accumulate, and the more acute their insight into various problems during the construction process, and the more effective their solutions. A contractor with more than 10 years of experience can often make quick judgments and take appropriate measures when faced with technical difficulties, material problems, or unexpected situations that may arise during construction, thanks to their rich experience.
Relevant qualification certificates are crucial proof that contractors can legally and compliantly conduct business and possess the corresponding technical capabilities. General contracting qualifications for highway engineering construction and professional contracting qualifications for highway pavement engineering are common and essential qualifications in asphalt pavement construction. These qualifications are divided into different levels, with specific requirements regarding the company’s assets, personnel, technical equipment, and project performance. A Class A general contracting qualification for highway engineering construction requires the company to have net assets of over 100 million yuan, an average annual value-added tax payment of over 8 million yuan in the past three years, and at least 10 Class A registered construction engineers specializing in highway engineering. When selecting a contractor, it is essential to confirm that they possess qualification certificates commensurate with the project’s scale and requirements to ensure construction quality and the smooth progress of the project.
The quality of materials directly affects the quality and service life of asphalt pavements; therefore, checking the source and quality assurance of materials is crucial. High-quality asphalt and aggregates are the foundation for ensuring pavement strength, durability, and stability. Requiring contractors to provide material inspection reports and quality certificates is a key step in ensuring material quality. Inspection reports should detail various performance indicators of the materials, such as the penetration, softening point, and ductility of asphalt; and the particle size distribution, crushing value, and mud content of aggregates. These indicators must comply with relevant national standards and industry specifications.
Understanding the source of materials is also crucial. Reliable suppliers typically have rigorous quality control systems, enabling them to provide consistent, high-quality materials. When selecting a contractor, inquire about their material suppliers and investigate their reputation and track records. If a contractor has long-standing partnerships with well-known, large material suppliers, the quality of their materials is more assured. You can also request the contractor to provide purchase invoices and quality traceability records for materials, allowing for timely tracing and resolution of any quality issues.
Contract terms are crucial for protecting the rights of both parties, with details regarding responsibilities and warranties being particularly important. Regarding responsibilities, the rights and obligations of both parties during the construction process must be clearly defined. The contractor is responsible for construction quality, schedule, and safety, ensuring construction is carried out according to design requirements and construction specifications. If the project quality is substandard due to the contractor’s fault, the contractor shall be responsible for rework and repair, bearing the resulting costs and losses. The owner, in turn, should make timely payments as stipulated in the contract and provide necessary construction conditions and assistance.
The warranty period and scope are also crucial aspects of the contract. The warranty period should be reasonably determined based on the nature and characteristics of the project; generally, the warranty period for asphalt pavement is 1-3 years. Within the warranty scope, the contractor is responsible for free repairs of any quality problems that occur on the pavement, such as cracks, potholes, and peeling. The contract should detail the specific contents and conditions of the warranty to avoid unclear responsibilities in case of future disputes.
While price is an important factor when choosing a contractor, it shouldn’t be chosen blindly simply because the price is low. A comprehensive consideration of cost-effectiveness is crucial. A low price may indicate problems with the contractor’s material selection, construction techniques, or personnel, thus affecting the quality of the project. Some low-priced contractors may use inferior asphalt and aggregates, or cut corners during construction, leading to various quality problems on the road surface in a short period. The subsequent repair costs will far outweigh the initial savings.
Therefore, when evaluating contractors, factors such as price, quality, and service should be considered comprehensively. Comparing quotes and service packages from multiple contractors, along with their past project cases and reputation, allows you to choose the contractor offering the best value. A contractor with a moderate price but high-quality construction and comprehensive after-sales service may have slightly higher initial costs, but in the long run, it can save the homeowner significant maintenance costs, making it a wiser choice.
While DIY asphalt paving may seem cost-effective in some situations, it actually carries numerous risks. Lack of experience is one of the main problems associated with DIY paving. Asphalt paving is a highly specialized task, requiring knowledge and skills in material properties, construction techniques, and equipment operation. Ordinary people, lacking relevant experience, often struggle to ensure quality workmanship, leading to issues such as improper material proportions, uneven paving thickness, and insufficient compaction. These problems can result in various road surface defects during use, such as cracks, potholes, and ruts, increasing future maintenance costs.
Professional paving offers significant advantages. Professional contractors possess extensive experience and specialized technical teams familiar with various construction techniques and specifications. They can select appropriate materials and construction methods based on different road conditions and design requirements, ensuring pavement quality. Professional contractors also have advanced construction equipment, such as pavers and rollers, which improves construction efficiency and quality, resulting in a smoother and denser pavement. Furthermore, professional contractors typically offer a warranty period. During this period, they will be responsible for free repairs should any quality issues arise, providing greater protection for the owner.
A good reputation is one of the key indicators of a reliable contractor. We can obtain information about a contractor’s reputation by consulting other homeowners, checking online reviews, or contacting industry associations. If a contractor has a good reputation in the industry and has received recognition and praise from many homeowners, then their workmanship, service attitude, and integrity are generally more reliable.
A professional team is key to ensuring project quality. A reliable contractor should have a construction team with extensive experience and professional skills, including project managers, technicians, and construction workers. These personnel should be familiar with asphalt pavement construction techniques and specifications, and be able to operate various construction equipment proficiently to ensure the smooth progress of the construction process.
Comprehensive after-sales service is also an important factor to consider when selecting a contractor. After the road surface is put into use, a reliable contractor should provide timely and effective after-sales service, such as regular follow-up visits, maintenance, and technical consultation. When quality problems occur, they should be able to respond quickly and resolve the issues promptly to ensure the normal use of the road.
Routine inspections are crucial for the maintenance of asphalt pavements. They enable the timely detection of potential problems, preventing further damage and extending the pavement’s lifespan. The frequency of inspections should be determined based on pavement usage and traffic flow. For main roads and highways with high traffic volume, weekly inspections are recommended; for less congested residential roads and rural roads, inspections can be conducted every two weeks.
During the inspection, special attention should be paid to whether cracks and depressions appear on the road surface. Cracks can be inspected visually and by touch. Carefully observe the road surface for tiny cracks; for cracks that are not easily noticeable, a magnifying glass can be used for observation. When touching cracks, pay attention to their depth and width to assess their severity. Any cracks found should be marked promptly, and their location, length, and width recorded for subsequent handling.
For inspecting dents, a 3m straightedge can be used. Place the straightedge on the road surface and observe the gap between the straightedge and the road surface. If the gap exceeds a certain standard, such as 5mm, it indicates that there is a dent in the road surface. You can also judge the presence of a dent by the feeling when driving; if you feel a bumpy ride, it may be due to a dent. For each dented area, its location, size, and depth should be recorded to develop an appropriate repair plan.
Seasonal maintenance is an important measure to extend the service life of asphalt pavements. By adopting corresponding maintenance methods based on the characteristics of different seasons, the pavement can be effectively protected and the occurrence of defects can be reduced.
In winter, antifreeze is a key maintenance focus. When temperatures drop below 0°C, moisture on the road surface easily freezes, forming ice. This not only affects vehicle safety but also damages the road structure. To prevent road icing, de-icing agents can be spread on the road surface. These agents lower the freezing point of water, causing ice and snow on the road to melt quickly and prevent freezing. However, care must be taken with the amount of de-icing agent used; excessive use may pollute the road surface and the environment. Snow removal is also an important winter maintenance task. Timely removal of snow from the road surface reduces the pressure of snow on the road and prevents melted snow from seeping into the road structure and causing damage. When removing snow, appropriate snow removal equipment should be used to avoid scratching and damaging the road surface.
In summer, sun protection is crucial for maintenance. Strong summer sunlight and ultraviolet radiation significantly impact the aging of asphalt pavements. Prolonged UV exposure degrades polymers in asphalt, leading to decreased pavement strength and durability. To reduce UV damage, reflective paint can be applied to the pavement. This paint reflects sunlight, lowering the pavement temperature and reducing asphalt aging. Regular watering can also help cool the pavement, keeping it moist and reducing asphalt softening and flow.
Traffic management has a significant impact on the lifespan of asphalt pavements. Reasonable traffic management measures can effectively reduce pavement wear and extend its service life.
Heavy-duty vehicles carry a greater load, thus increasing the pressure on the road surface. Under the repeated pressure of these vehicles, the road surface is prone to ruts, cracks, and other defects, accelerating road damage. Restricting the passage of heavy-duty vehicles is a crucial measure for road protection. This can be achieved by setting up weight limit signs and installing weighing equipment to check the weight of vehicles entering the road and prohibit overweight vehicles from passing. For heavy-duty vehicles that must pass, measures such as restricting their routes and controlling their speed can be implemented to minimize their impact on the road surface.
Optimizing traffic flow can also effectively reduce road surface wear. By optimizing traffic light settings and guiding vehicle flow, vehicles can be evenly distributed across the road surface, preventing them from concentrating in one area and thus reducing localized wear. Furthermore, strengthening traffic order management can reduce sudden braking and sharp turns, lowering the impact of vehicles on the road surface.
The resealing cycle should be determined based on road surface usage and environmental conditions. For roads with high traffic volume and heavy vehicle loads, the wear and tear on the road surface is more severe, leading to faster deterioration of the sealant layer; therefore, the resealing cycle is generally 1-2 years. On main roads in some cities, due to frequent vehicle traffic, the sealant layer is prone to wear and cracks, requiring resealing every 1-2 years to ensure the road surface’s sealing and durability.
For roads in residential areas and rural roads with low traffic volume, the resealing cycle can be appropriately extended, generally every 2-3 years. In areas with harsh environmental conditions, such as those with high temperatures, heavy rainfall, and strong ultraviolet radiation, the sealing layer is more severely corroded, and the resealing cycle should be shortened accordingly. In some southern cities, due to abundant rainfall and strong ultraviolet radiation, the sealing layer is prone to aging and damage, and may need to be resealed annually.
Resealing significantly enhances the road surface’s waterproofing, preventing rainwater from seeping into the pavement’s structural layers and reducing water erosion, thus extending the pavement’s service life. Resealing also improves the pavement’s resistance to aging, reduces UV damage, and maintains its strength and stability. Furthermore, resealing creates a smoother surface, improving driving comfort and safety.
Road surface lifespan is influenced by a combination of factors. Material quality is the fundamental factor determining road surface lifespan; high-quality asphalt and aggregates provide better adhesion and durability, making the road surface more robust and durable. In the construction of some important transportation hubs and highways, the use of high-quality modified asphalt and premium aggregates can extend the road surface lifespan to 15-20 years; while roads using low-quality materials may develop serious damage within 5-10 years, requiring large-scale repair or reconstruction.
Construction quality is equally crucial. Strict adherence to specifications during construction, ensuring a stable foundation, adequate compaction, and uniform paving, can effectively extend the pavement’s lifespan. If shoddy workmanship or insufficient compaction occurs during construction, the pavement is prone to cracks, potholes, and other defects, significantly shortening its lifespan. Traffic load is also a significant factor affecting pavement lifespan. Roads with high traffic volume and heavy vehicle loads experience greater pressure and faster wear, resulting in a relatively shorter lifespan. In some mining areas with heavy traffic, the pavement may require multiple repairs within 3-5 years due to the heavy vehicle loads, while rural roads with lower traffic volume, with proper maintenance, can have a lifespan of 10-15 years.
Environmental conditions also significantly impact pavement lifespan. Natural factors such as high and low temperatures, rain, and ultraviolet radiation accelerate pavement aging and damage. In hot and rainy areas, pavements are prone to water damage and rutting; in cold regions, pavements are susceptible to freeze-thaw cycles, leading to cracks and potholes. By implementing effective maintenance measures, such as regular inspections, timely repairs, and proper sealing, pavement lifespan can be extended to some extent, improving pavement efficiency.
Laying asphalt pavement is a systematic and complex project, encompassing multiple key stages from project planning, foundation preparation, paving construction, compaction, curing, sealing and protection, and post-construction maintenance. In the project planning phase, accurate measurement, reasonable material estimation, thorough understanding of asphalt properties, comprehensive assessment of environmental factors, scientific budget and timeline planning, and correct selection of asphalt type are fundamental to ensuring the smooth progress of the project. In the foundation preparation and site treatment phase, thoroughly removing old pavement and debris, stabilizing and compacting the subbase, avoiding the use of loose soil, and appropriately selecting base materials while ensuring the uniformity and load-bearing capacity of the base layer lay a solid foundation for asphalt pavement laying.
Slope and drainage design are crucial. Accurate calculation of longitudinal and transverse slopes, effective prevention of water accumulation, proper integration of the surrounding drainage system, and strict control of slope measurement accuracy can effectively prevent water damage to the road surface and extend its service life. During asphalt paving, precise control of material temperature, uniform material output, reasonable management of paving speed, planning of road thickness according to traffic load, skillful handling of joints, and avoidance of using low-quality asphalt are key to ensuring road surface quality.
During the compaction and curing stages, selecting appropriate compaction tools and using them correctly, strictly controlling the density of layered compaction, avoiding deformation and rutting risks caused by insufficient compaction, reasonably controlling the curing time and taking effective protective measures, and fully considering the impact of environmental factors on curing can ensure that the pavement reaches the design requirements for strength and stability. In the sealing and surface protection stages, grasping the optimal sealing time, selecting the appropriate sealant and correctly calculating the dosage, mastering uniform application techniques, avoiding the pitfalls of hasty sealing, recognizing the risks of unsealed pavements, and reasonably determining the frequency of regular sealing maintenance can effectively protect the pavement and extend its service life.
During construction, it is essential to avoid common errors such as improper foundation preparation, inappropriate material temperature, insufficient compaction, insufficient thickness, lack of drainage planning, use of inferior materials, incorrect subgrade grading, and rushed curing. Simultaneously, it is crucial to thoroughly understand the causes of common pavement problems such as spalling, depressions, potholes, alligator cracks, longitudinal cracks, block cracks, edge cracks, and bulges, and to master corresponding temporary and permanent repair strategies.
When selecting and cooperating with contractors, it is crucial to comprehensively evaluate their experience and qualifications, carefully examine the source and quality assurance of materials, clearly define the responsibilities and warranty details in the contract, avoid low-price traps and comprehensively assess cost-effectiveness, recognize the advantages of professional paving over DIY, and recommend reliable contractors based on criteria such as good reputation, professional team, and comprehensive after-sales service. These are important measures to ensure project quality. Regarding long-term maintenance and lifespan extension, regular routine inspections to detect cracks and depressions early, winter antifreeze and summer sun protection maintenance according to seasonal characteristics, reasonable traffic management to limit wear and tear from heavy vehicles, scientifically determining the resealing cycle and understanding its benefits, and in-depth analysis of factors affecting pavement lifespan and taking corresponding measures can effectively extend the service life of the pavement.
Professional guidance plays a crucial role throughout the paving process. With their extensive experience and expertise, professionals can provide accurate technical support and decision-making advice at every stage, ensuring strict adherence to specifications and standards during construction and effectively preventing quality problems caused by technical errors and lack of experience. With continuous technological advancements, sustainable paving has become an important direction for the future development of asphalt pavements. The research and application of new environmentally friendly asphalt materials, such as warm-mix asphalt and rubber asphalt, can not only reduce energy consumption and carbon emissions but also improve pavement performance and durability. The application of intelligent construction technologies, such as automated pavers and intelligent compaction equipment, can improve construction efficiency and quality, reducing the impact of human factors on construction quality. In future asphalt pavement construction, we should actively explore and apply these new technologies and materials to continuously improve the quality and environmental performance of asphalt pavements, contributing to the sustainable development of transportation infrastructure.